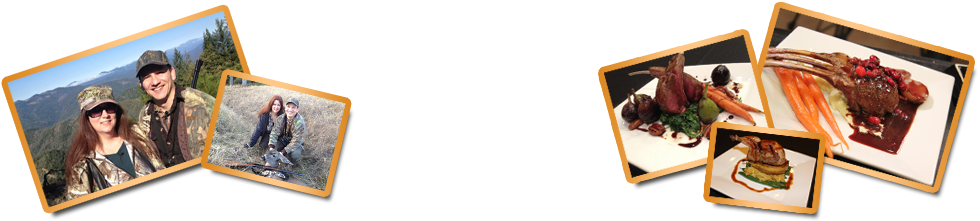
 Of all the cooking methods I use to put wild food on the table, sous vide cooking has to be the most intriguing and exciting. Sous vide cooking isn’t necessarily new in restaurants, but due to advances in scaling the equipment for home use, and making it affordable, sous vide has allowed home cooks to take advantage of precision cooking. I’ve teamed up with Sous Vide Supreme to create a series of wild game recipes, using their water oven.
You might look at this type of cooking with some intimidation and skepticism, but just like any other kitchen appliance that has come before, it can help you create some truly applause worthy meals without a lot of guess work. Now, as a professional cook, I never want to just solely rely on a machine to tell me when a meat or vegetable has reached the optimal state of doneness. Keeping up with traditional techniques, such as dry roasting, grilling, braising, poaching and so on, help my culinary intuition remain sharp. Knowing when to pull that venison roast out of the oven or off the grill is important, especially when access to modern equipment isn’t available. So I like to think of water ovens, and immersion circulators as other kitchen appliances that help me along the way. But how I conceptualize a dish, how I combine different flavors, and present the finished product will always come from me, not a machine.
So, what is “Sous Vide” anyway? In the simplest terms, sous vide means, “under pressure.” This term refers to using a vacuum sealer and a special bag to remove air from the food and sealing the bag to prevent the water from seeping in as it cooks. Interestingly, the bag is not the main idea in this form of cooking. The most important part of sous vide, is immersing the food in the perfect water temperature for a particular amount of time that allows the break down of the meat/vegetable/fruit without leaching out it’s moisture, and maintaining that temperature within a fraction of a degree. Now that is precision cooking!!!
Sous vide cooking was actually part of food processing plants, decades before being adapted for restaurants or as a home cooking method. Cooking food in this manner was meant to pasteurize it for maintaing a longer shelf life. In the 1970s, a French biochemist, Bruno Goussault developed the idea of cooking meats in a temperature controlled water bath as a solution to tenderize those less expensive, but tougher cuts of meat. After sharing his method with French chefs, the idea of cooking food at a precise water temperature opened the door to an innovative cooking technique.
Due to FDA regulations, it has taken longer for the United States to adopt this type of cooking method, and even longer to bring it to the home cook. Thanks to French and American chefs Daniel Boulud, Thomas Keller, and other pioneering chefs, we now can utilize this method at home…. and “tame our wild game”!
Sous Vide cooking is about creating an environment where the food is broken down, slowly, gently, and at the exact temperature needed to achieve the degree of doneness, and most importantly to “maintain” that temperature so it’s not overcooked. In traditional cooking, heat is applied to the outside of the meat, and at much higher temps in an attempt to pull the heat into the food, to break down the fibers and eventually gain the degree of doneness. But with sous vide cooking, that temperature is created from the outside and maintained the whole way through, without such a high external temperature. For example, if I want to cook a venison roast, I have to first sear the meat, then dry roast it in a 350F degree oven for a particular amount of time to achieve an internal temperature of 140F. The problem with this method is the external part of the venison is subject to much higher temperature which causes the meat to release it’s moisture, causing some degree of dryness. With sous vide cooking, I can set the temperature to the exact degree so the moisture stays within the cell walls of the venison, and very little leaches out of the meat, and yet it still cooks. And because the moisture loss is minimal, the flavor stays within the meat. The texture is also improved, resulting in a very soft interior.
What I’m also able to achieve is the ability to leave the meat immersed in the water for a much longer time, without having to serve it immediately if I’m not ready, so my timing is better controlled. In my personal chef business, I’ve found this cooking method so helpful. If a client schedules dinner to begin at 7pm, but a guest calls and says he/she is going to be a few minutes late, I can hold the venison up to 4 hours without compromising the integrity of the meat. Once all the guests arrive, I can remove the roast from the water bath, and after a quick sear in a pan for color, every guest can have a perfectly cooked 140 degree venison on their plate. This would be impossible to achieve with a traditional method of oven roasting. What it also does, is free me from the need to “babysit” a dish. I can drop the meat/vegetable/fruit into the water, and move to other food prep until the timer goes off, and if I can’t get to it for a few more minutes, it will still be at the temp I set it for, so it’s not overcooked.
It’s also a very “clean” way to cook. I don’t need several pans, and saves on clean up because the bag is just discarded after cooking. Another great aspect to sous vide cooking, is the ability to cook many foods days, or weeks ahead. If I want to cook moose shanks for an upcoming dinner, I simply cook them for about 25 hours, in a water bath, then quickly chill them in ice water, and leave them in the sealed bag, and place them directly in the freezer. On the day of service, I just defrost them and place them back in the water oven at the original temp. just to warm it through. This allows me to pre-cook food and if my husband wants dinner and I’m out of the house, he can have a home cooked meal as if I’m there cooking it for him. And believe me HE LOVES THAT! It also helps busy folks create several make-ahead dinners for days when time is so limited. This is the ultimate in boil-in-a-bag cooking.
Now that I’ve covered the amazing benefits of what Sous Vide cooking does, I’d like to talk about the most important consideration when using this cooking method:
BACTERIA FORMATION!
Sous vide cooking creates an anaerobic environment which bacteria needs, and one that cooks food in temperatures within the range in which bacteria thrive (40F/4.4C–140F/60C). With that in mind, there are steps that must ALWAYS be taken to minimize the opportunity for ever present bacteria in foods to become dangerous in sous vide cooking. In every recipe, I will include preparations that are NEVER to be ignored. I caution you, not to dissuade you from using sous vide as a cooking method, but to educate you on the importance of food safety. It would be irresponsible of me as a food preparer not to teach you about keeping food safe for your consumption.
There are a few steps that can greatly minimize the risk:
One, Always keep your cooking area, and utensils clean and sanitized. Cross contamination happens easily when working with moist foods. Make certain cutting boards, knives, kitchen towels are scrupulously clean.
Two, always pick the freshest ingredients possible, and store them for optimal freshness. This is especially important for wild game. It’s a long way from field to table, and any misstep can create bacteria that grows like lightning. Always wash/rinse vegetables and fruits, before preparing them. Always look for any obvious signs of mold or parasites.
Three, vacuum sealed food that is to be cooked in a water bath can be taken directly from freezer, or fridge into the water. If you need to defrost an ingredient, such as meat, make sure the method of defrosting is either by refrigerating for a couple days, or for quick defrosting, by submerging the meat in an ice bath.
Four, **Unless it’s to be consumed right away, ALWAYS cool the sous vide food immediately after cooking in an ice water bath. Once it’s cooled completely, it can be stored back in the fridge or freezer.
So let’s first look at how the food is placed “under pressure.”
Tools for the Job: Not many tools are needed and in fact, most of you will have the tools available in your kitchen right now.
For sous vide cooking, you need:
1. Something to hold the food that seals out water.
2. A vessel to hold the water.
3. A heater for the water.
4. A thermometer to maintain the proper cooking temperature.
Suction Vacuum Sealer or Chamber Sealer, Zip Lock bag, or Canning Jars:
A. Suction Vacuum Sealer: Allows food to be placed in a specially designed bag with a machine that removes all the air from inside the bag and seals the bag to prevent water from seeping in as the food is submerged.
B. Chamber Sealer: Liquid can be placed in the bag and the chamber itself has the air removed so liquids are not pulled out the way a suction sealer does. This sealer allows for soups, stews, marinades or sauces to be cooked sous vide.
C. Zip Lock Bag and Archimedes Principle: Since the water temperatures for sous vide cooking don’t go beyond that of simmering water, a gallon size zip lock bag can be used, along with the Archimedes principle of water displacement. *The reason to remove as much air as possible is for two reasons. One, to allow the food to stay surrounded by the water for proper cooking, and two, because extra air in the bag will cause lightweight foods to float on top, instead of remaining fully submerged.
To use the Archimedes principle: Fill the pot or container with water. Add the food to the zip lock bag and seal it half way. Push the bag into the water until it reaches just below the zip lock seal. The water pressure will push the remaining air from the bag. Then while the bag is partially submerged, slide the zip lock the rest of the way to seal out the water. Make sure the bag is properly sealed before releasing the bag into the water.
D. Canning Jars: Canning jars can be used just as if you would be using a pressure canner. Make sure the lids are tight enough to keep out the water before placing the jars in the water bath.
Once the food is sealed in a water proof container or bag, let’s look at the options for cooking:
Cooking Appliances:
1. Stovetop with Pot of Water and a Digital Thermometer: A stockpot full of water on the stove with a digital thermometer can be set to alert when the proper water temperature is reached, and when it becomes too hot, or too cold so the temp can be adjusted, manually by either turning up or down the heat, or by adding a few ice cubes.
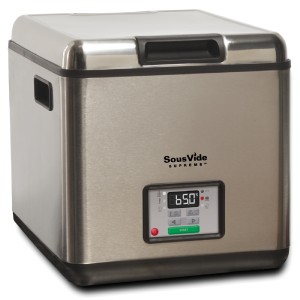
2. Water Oven: A fully contained vessel to hold the water, and an internal heater which heats the water to the proper temp, and an internal thermometer that maintains the desired temp throughout the cooking process. I use a Sous Vide Supreme Water Oven, as my appliance of choice.
3. Immersion Circulator: An immersion circulator is simply a device that is attached to a pot or other heat safe cooking vessel that heats water, has a built in thermometer to maintain the proper temperature, and a pump that circulates water on a continuous basis to keep the water completely circulating around the food to maintain a temp, the whole way through to the core of the meat/vegetable/fruit.
Due to their popularity and increased use, the price of immersion circulators has come down considerably and can be found online and in stores for under $200.
Now that we’ve covered what is needed to cook sous vide, and the safeguards for food safety, we can look at recipes that benefit from this modern cooking method.
In each recipe, I will include the cooking temperatures and times I’ve experimented with to cook your wild game/vegetables/fruits to achieve a great end result. I will include the minimum cooking times and the maximum times food can be held in a water bath.
With the recipes I post as sous vide method, I will also give an alternative cooking method for those who don’t have the necessary tools available. The outcome will be a bit different, but always tasty.
Let’s get cooking!!
