

Click on the image to the right to watch Bobbie Jo’s video on canning venison!
PRESSURE CANNING WILD GAME
Late each Summer there is always that one day when I can point to and notice a slight change which signals Autumn is coming. The breeze is a bit cooler, and almost overnight the leaves begin to lose that summer green tint. That familiar spicy smell from decaying grasses and vegetation permeates the air. Gardeners are in a marathon to preserve their last of the season fruits and vegetables. Just as the squirrels and chipmunks begin storing food, we also begin turning our attention to pickling, and preserving our last of the seasons’ bounties before winter sets in.
For hunters, that change in the air signals the upcoming hunting season!!! My husband begins organizing his hunting gear. His Fall/Winter hunting clothes need washed. He heads to the range to site in his rifle. The summer mats in the XTerra are replaced with rubber ones. Toward the end of Summer, we sit down together and pull out our calendar to schedule all the weekends for hunting (and football games of course), which zones he’ll hunt, and for which states his tag was drawn. He pulls out the latest Cabela’s and Bass Pro catalogs for his gadget wish list. He begins making his case for why he needs yet another camo shirt…as if eight aren’t enough.
My attention turns to planning dinners I’m going to prepare when the freezer is full. Autumn is my absolute favorite season for cooking.The spices of Fall like cinnamon, cardamom, allspice sit right on the counter. There is no need to put them away because I use them so much in Autumn. My favorite vegetables are also in season this time of year. Parsnips, celery root, turnips, pumpkin squashes, yams and other root vegetables have arrived. They need only a drizzle of walnut oil and a bit of vanilla salt before going into a 400º oven to bring out their natural sugars that make a sticky sweet glaze. They’re served along side Guinness braised venison shanks! And I love utilizing those under appreciated cuts. Those tough chewy bits are never given the love they deserve. It’s easy to smile at a tender backstrap, but much harder to love the toughest muscles from the shanks and shoulders. But with low and slow braises, stews and soups, they turn into show stopping dishes which are my favorite. They are the type of dishes that warm every square inch of the kitchen, and create a smell like no other.
Just like gardeners, hunters like to preserve their harvest. Sausages, jerky, and canned meats are on their agenda. Which brings me to the topic of canning wild game. Canning game is an easy process and one that allows us to preserve our harvest long after buck season ends. It also makes quick work of week night dinners, when there is little time for 4 hour braising. Since canning also cooks the meat, only a quick trip to the sauté pan, or microwave is needed. And if you’re like my sister, you just need to open the jar and grab a fork. Canning is the perfect method for preserving those tough cuts from the front shoulder, neck and hind quarters.
I’m going to go over the basics of the canning process, but I highly recommend reading more about the subject before you dive into it (*See Suggestions below for further reading). Just in the way sous vide cooking has important guidelines for safe food preservation, canning is equally as important. My main goal has always been and will always be keeping you safe.
Bacteria, yeasts, and molds the most important considerations when canning meat. I’ll never tell you a food preserving process is 100% safe, but you can be far more assured if you understand the process and follow the guidelines.
First, there are two types of foods to consider when canning and which type of canner will work for each type of food.
High Acid Foods (HAF): High acid foods are those which naturally develop a higher acid content which only need 212ºF/100ºC processing temperature to render them safe for a long shelf life. Fruits and vegetables such as lemons, tomatoes, peaches, plums, and sauerkraut fall under this category.
Low Acid Foods (LAF): Low acid foods need to reach 240ºF/115ºC for safe processing. Meats, beets, green beans, and corn fall under this category.
A Water Bath Canner (WBC) can be used for HAF, since the Water Canner can only reach the point of boiling water or 212ºF/100ºC. At this temperature, HAF are rendered safe from yeasts, molds and bacteria, which are called “the Spoilers.”
But LAF such as meats, beets, and green beans must reach a far higher temperature and that is when a Pressure Canner (PC) is needed. The temperature must reach at least 240ºF/115ºC for a certain amount of time for safe preservation.
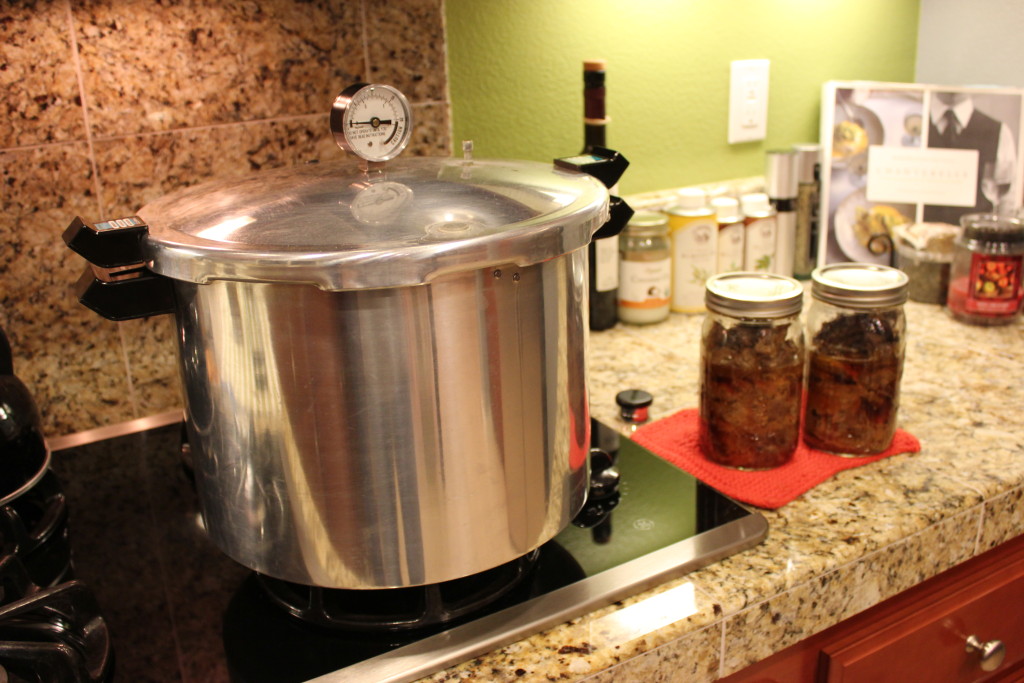
Since we are canning meat, let’s focus on LAF and the Pressure Canner: A pressure canner works, by allowing pressure to build inside the canning unit to create enough heat to raise the temperature to 240ºF/115ºC. My pressure canner is made by Presto, but you might have a different brand, however they all work on the same concept. Follow your manufacturer’s instructions for your pressure canner.
Where you live is a factor in the amount of pressure you need to achieve to can the meat. Since we live at 52 feet about sea level, according to our canning instructions, that means we need to reach 11 pounds of pressure and maintain it for 90 minutes. The Ball Blue Book canning guide and your pressure canner manufacturer will list the pounds of pressure (PP) and time based on your elevation.
Tips:
a. Make sure the meat is fresh, or has been pre-frozen (freshness of ingredients has a lot to with keeping “the spoilers” from growing.
b. Check all the jars for any cracks or chips, and do not use if they are damaged.
c. Check rings and lids and do not use any which are worn (a perfect seal is vital to keep mold, yeasts, and bacteria out.
Steps:
Sterilize the canning jars, lids and rings. This can be done by running the jars through the highest setting of your dishwasher and use the “heated dry” feature, or leave in the dishwasher until ready to use. (If this option is not available, add the jars to a clean sink and fill hot tap water first, then add boiling water to heat the jars).
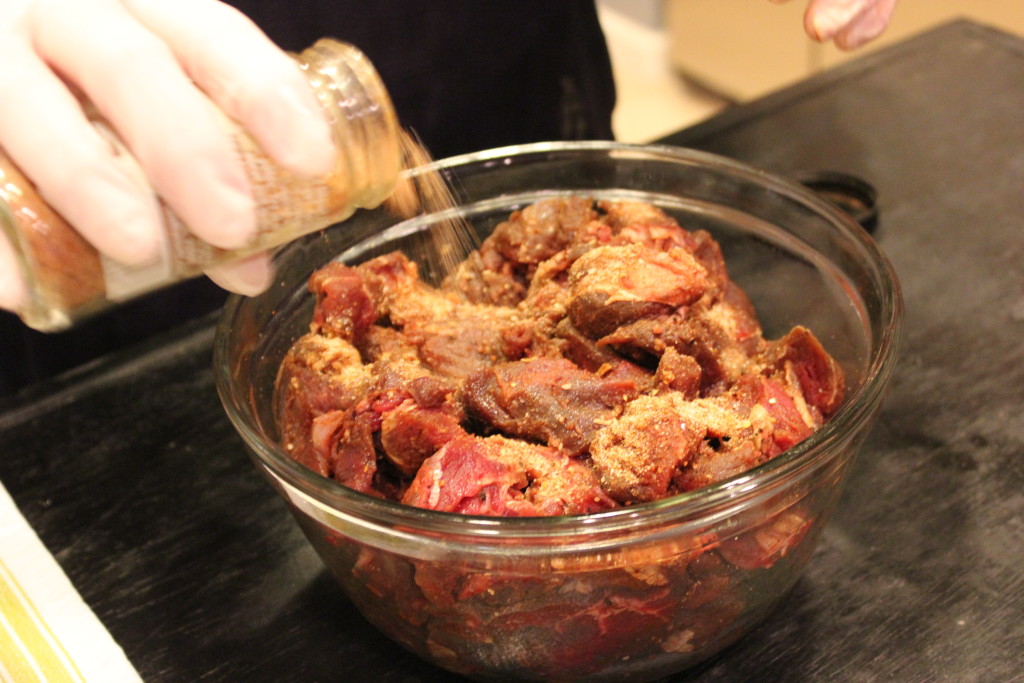
While the jars are being cleaned/heated, cut meat into 1.5 inch pieces (unless it’s been done ahead).
Generously season the meat with the BBQ rub and set aside until ready to use (***for regular canned meat, substitute the BBQ rub for: two heaping tablespoons minced garlic, 1/2 tablespoon kosher salt, and 1 teaspoon fresh ground pepper per quart jar).
Place the rack in the bottom of the canner and add 2 inches of water (that should equal about 2 liters of water (I use a juice pitcher to measure it). **To prevent hard water stains on the jars, add 1/4 cup white vinegar to the water. This will have NO effect on the canning process, it’s just to keep the jars from developing hard water build-up.
Heat the water to a gentle simmer.
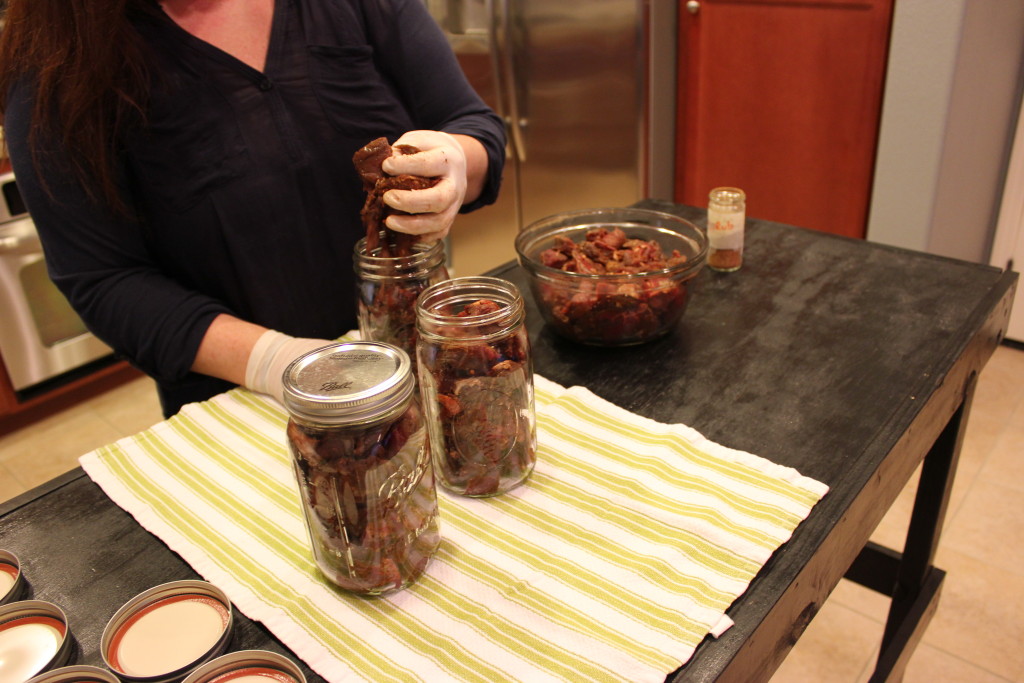
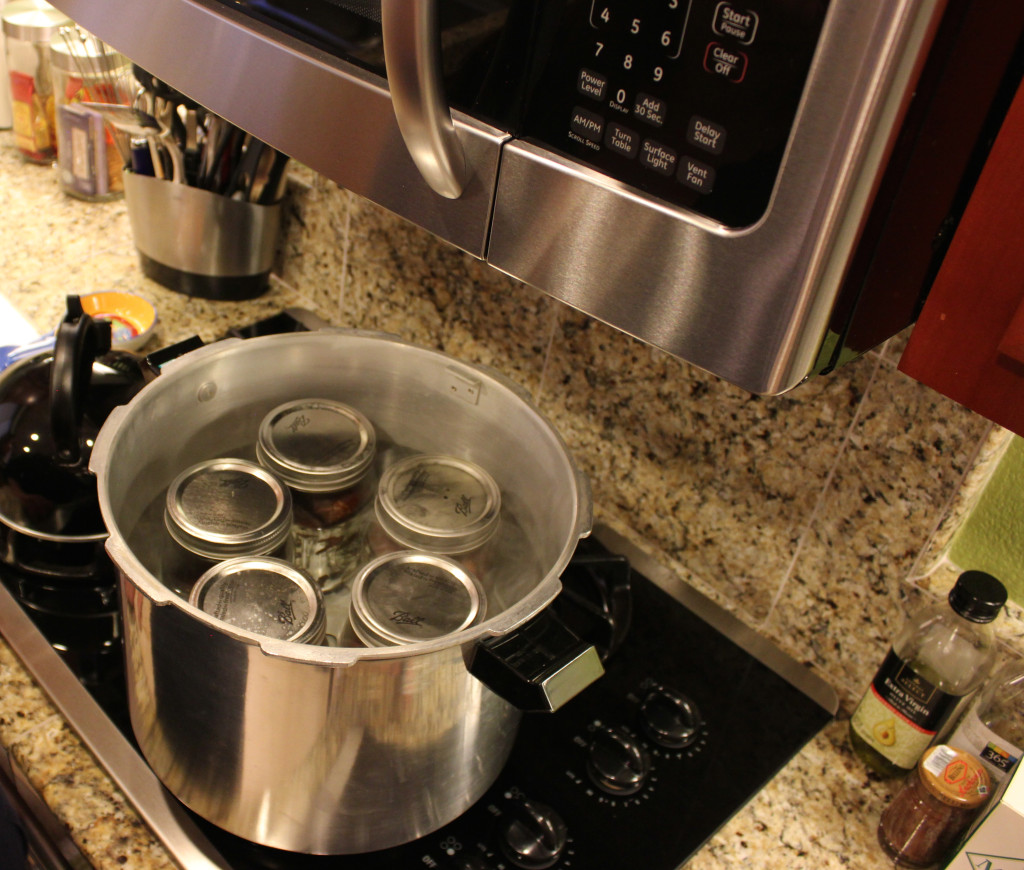
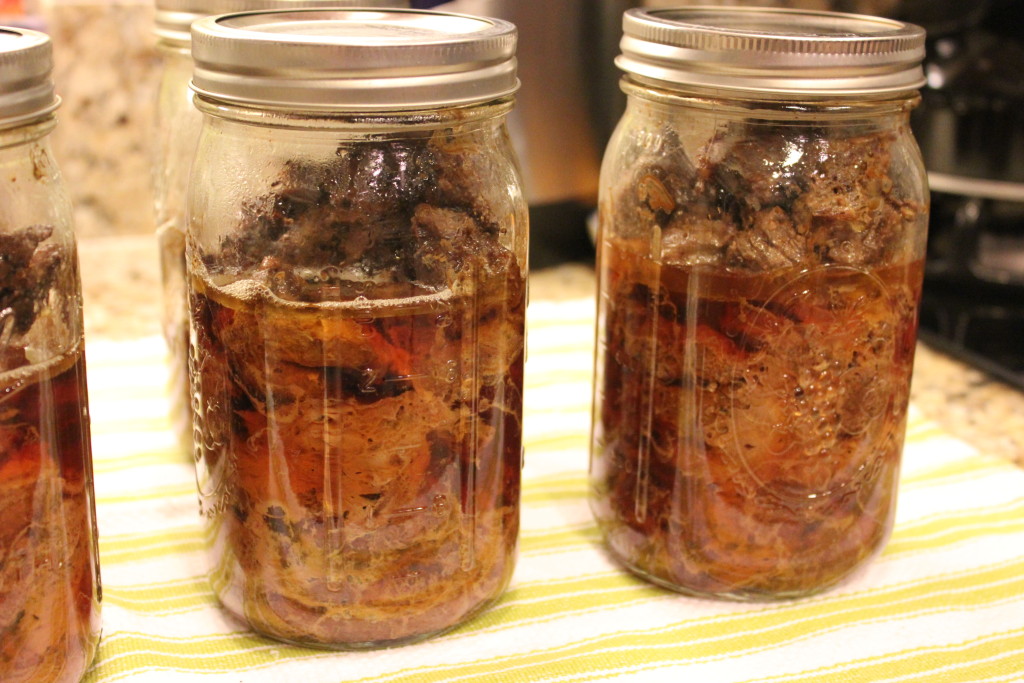
While the jars are still warm, quickly pack the jars with the seasoned raw meat.
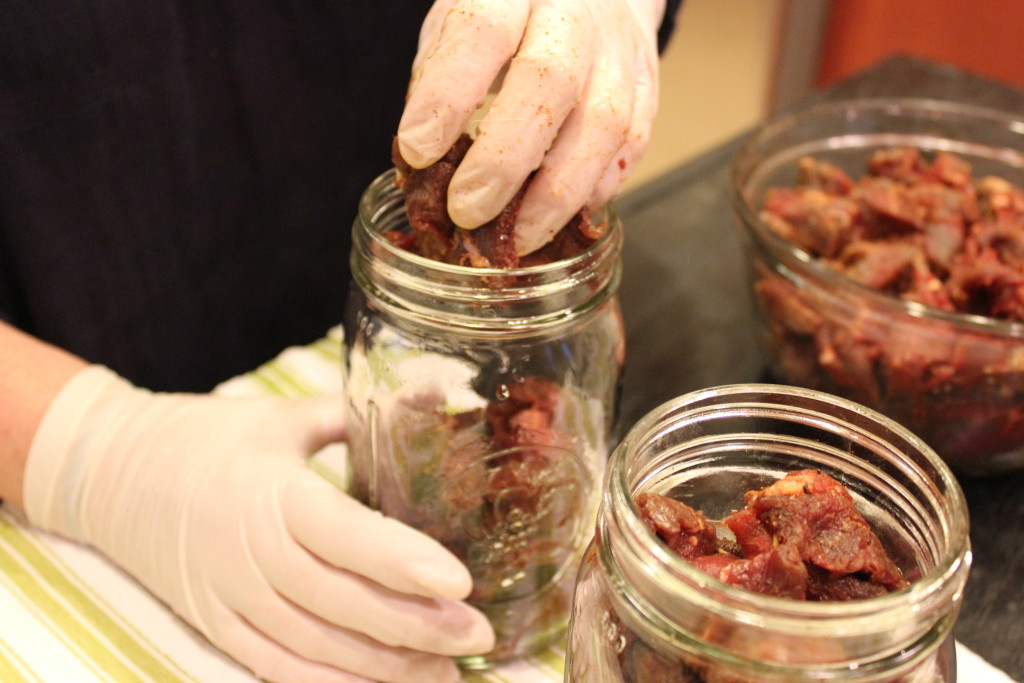
Wipe the outside of the jars and place the lids and rings on the jars, and hand tighten.
Once all the jars are filled, and lids/rings placed and tightened, place directly in the pressure canner.
Place the lid on the canner base and make sure to lock the lid!
Raise the heat on the burner and watch for a steady steam to come out of the steam vent (!CAUTION! Do not place your hand near the steam vent, serious burns can occur.)
Allow a steady stream of steam for 7-10 minutes.
After the canner has been releasing steam for 7-10 minutes, carefully place the pressure regulator over the steam vent.
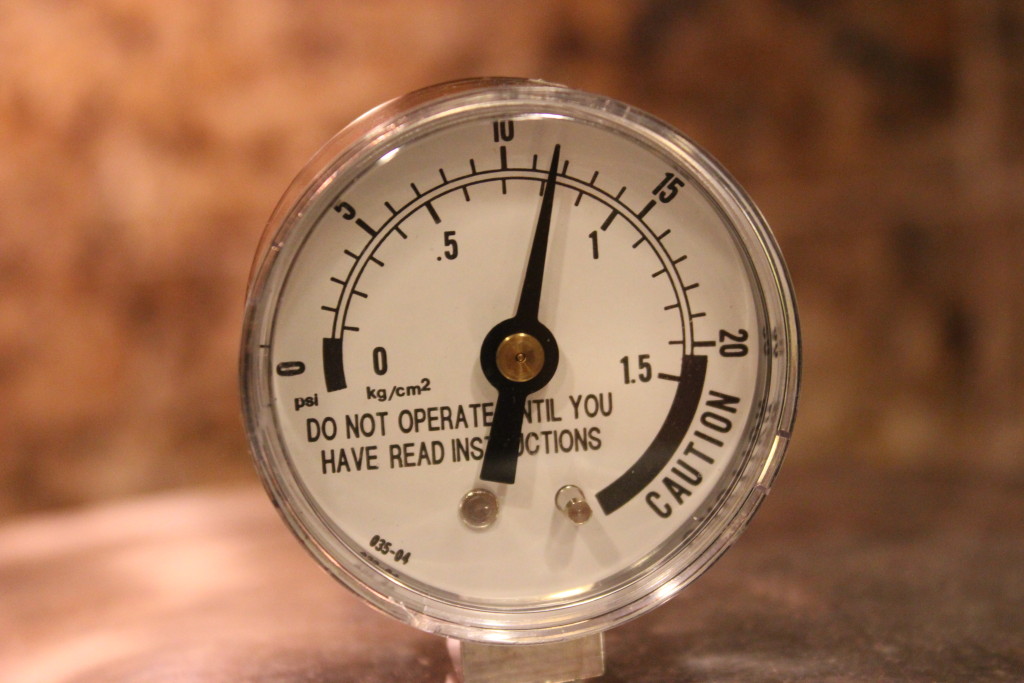
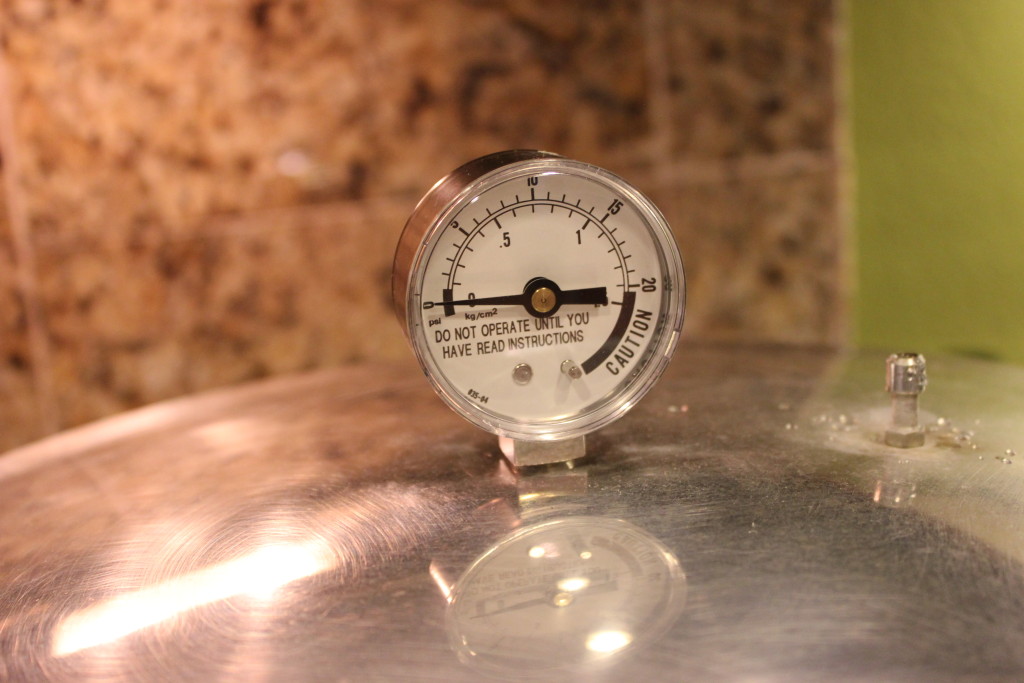
You will immediately begin to see pressure building inside the canner, by watching the pressure gauge.
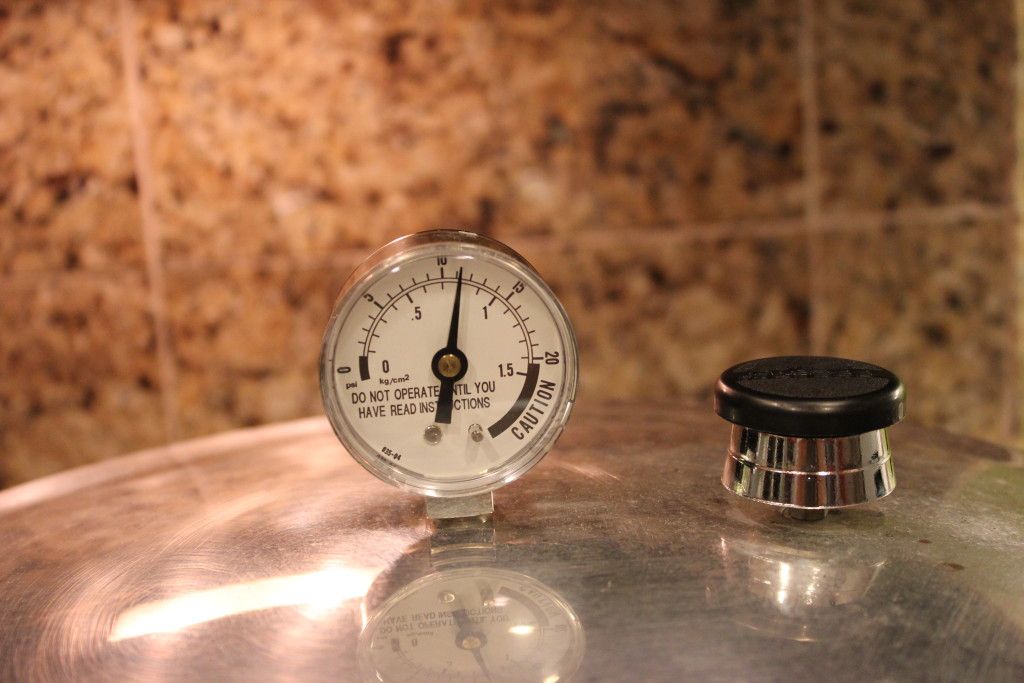
Once the canner reaches the correct pressure for your elevation, LOWER the heat to maintain sufficient pressure.
Set a timer for the correct amount of canning time (ours is 90 minutes).
From time to time, check the pressure and adjust the burner accordingly to maintain the PP needed for your elevation.
After the allotted time (approx. 90 minutes), turn off the burner completely and allow the pressure to slowly drop. (this could take about an hour).
DO NOT ATTEMPT TO OPEN THE CANNER AND DO NOT REMOVE THE PRESSURE REGULATOR! Serious burns can occur and the sudden drop in pressure could cause the jars inside to crack or break.
Once the pressure has dropped back to 0 and the unit has cooled, you may remove the pressure regulator and unlock the lid.
The jars will still be at the boiling stage or very hot, so remove the jars with a jar lifter.
Allow the jars to cool completely in a draft free area.
You may begin to hear the jars “pop”, this is the sound of the jars as they seal.
Once the jars are completely cooled, check the seal by pressing down on the top of the lid.
If the lid DOES NOT pop back up, the jar is sealed properly and can be stored on a shelf.
If the lid is NOT pressurized, store the jar of meat in the fridge and use within 5-7 days.
Label the jars for the type of meat and the date it was canned.
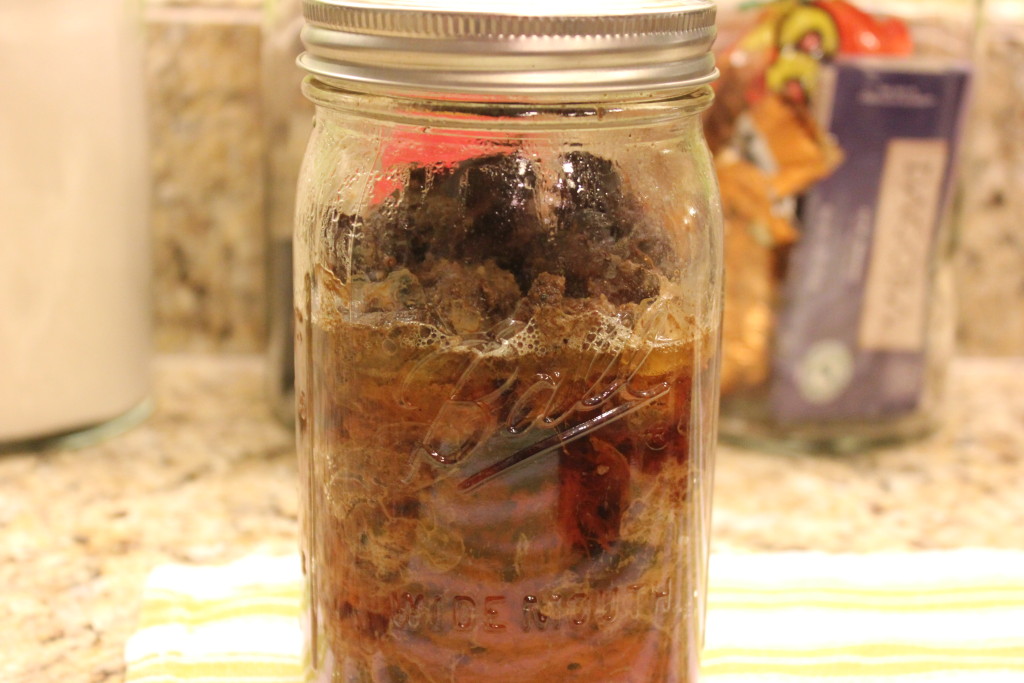
At this point, the meat is completely cooked, and preserved so it’s ready to heat and serve in your favorite recipes.
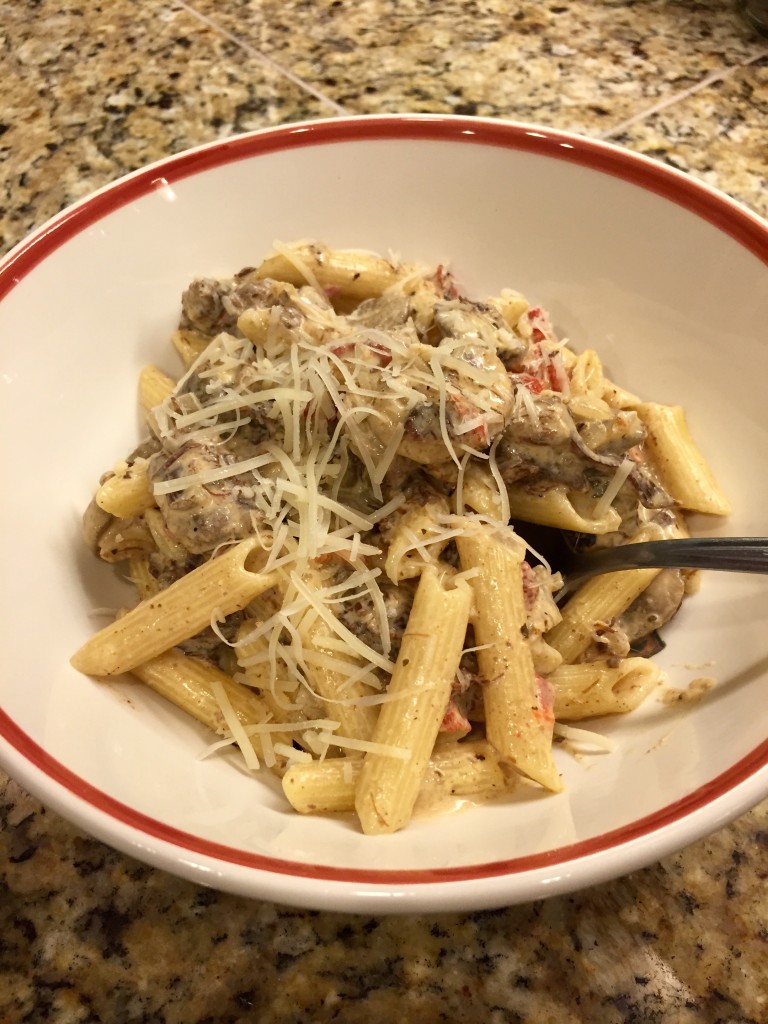
BBQ Canned Venison Pasta with Roasted Red Pepper Cream
Here is a small list of blogs, sites and books available on the subject, but I encourage you to gather as much information as possible on the subject before canning foods.
http://food.unl.edu/preservation
http://www.freshpreserving.com
http://www.motherearthnews.com/real-food/canning/home-canning.aspx
http://www.pressurecooker-outlet.com/index.htm
Books:
Stocking Up: The Third Edition of America’s Classic Preserving Guide buy Carol Hupping
Food Storage: Preserving Meat, Dairy, and Eggs by Susan Gregersen
A Guide to Canning, Freezing, Curing & Smoking Meat, Fish & Game by Wilbur Eastman
Ball Complete Book of Home Preserving by Ball
- 8 pounds Wild Game Meat (from shoulder, neck, hind quarter)
- 8 Tbs. BBQ Rub of your choice
- 1/3 cup (Spanish smoked or hot, Hungarian hot)
- 1/3 cup Onion Flakes
- 1/4 cup freshly ground black pepper
- 1/4 cup coarse salt (kosher or sea salt)
- 1/4 cup brown sugar
- 1/4 cup white sugar
- 2 tbs chili powder
- 3 tbs garlic powder
- 3 tbs onion powder
- 2 tsp cayenne
- 2 Heaping Tbs. Minced Garlic
- 1/2 tbs. Kosher Salt
- 1 tsp. Fresh Cracked Black Pepper
- Add all the ingredients and mix.
- Place in glass spice jars.
- Will keep for 3 months.
- Use with any BBQ recipes.
- Add the minced garlic, kosher salt and pepper to the bottom of each jar.
- Fill the jar with cubed meat, and continue on with processing instructions.
- Sterilize the canning jars, lids and rings. This can be done by running the jars through the highest setting of your dishwasher and use the “heated dry” feature, or leave in the dishwasher until ready to use. (If this option is not available, add the jars to a clean sink and fill hot tap water first, then add boiling water to heat the jars).
- While the jars are being cleaned/heated, cut meat into 1.5 inch pieces (unless it’s been done ahead).
- Generously season the meat with the BBQ rub OR (*use Garlic Variation by adding garlic, salt, and pepper into the bottom of each jar and eliminate the bbq rub) and set aside until ready to use (for regular canned meat, substitute the BBQ rub for: two heaping tablespoons minced garlic, 1/2 tablespoon kosher salt, and 1 teaspoon fresh ground pepper per quart jar).
- Place the rack in the bottom of the canner and add 2 inches of water (that should equal about 2 liters of water (I use a juice pitcher to measure it). **To prevent hard water stains on the jars, add 1/4 cup white vinegar to the water. This will have NO effect on the canning process, it’s just to keep the jars from hard water build-up.
- Heat the water to a gentle simmer.
- While the jars are still warm, quickly pack the jars with the seasoned raw meat, and wipe the outside of the jars and place the lids and rings on the jars, and hand tighten.
- Once all the jars are filled, and lids/rings placed and tightened, place directly in the pressure canner.
- Place the lid on the canner base and make sure to lock the lid!
- Raise the heat on the burner and watch for a steady steam to come out of the steam vent (!CAUTION! Do not place your hand near the steam vent, serious burns can occur.)
- Allow a steady stream of steam for 7-10 minutes.
- After the canner has been releasing steam for 7-10 minutes, carefully place the pressure regulator over the steam vent.
- You will immediately begin to see pressure building inside the canner, by watching the pressure gauge.
- Once the canner reaches the correct pressure for your elevation, LOWER the heat to maintain sufficient pressure.
- Set a timer for the correct amount of canning time (ours is 90 minutes).
- From time to time, check the pressure and adjust the burner accordingly to maintain the PP needed for your elevation.
- After the allotted time (approx. 90 minutes), turn off the burner completely and allow the pressure to slowly drop. (this could take about an hour).
- DO NOT ATTEMPT TO OPEN THE CANNER AND DO NOT REMOVE THE PRESSURE REGULATOR. Serious burns can occur and the sudden drop in pressure could cause the jars inside to crack or break.
- Once the pressure has dropped back to 0 and the unit has cooled, you may remove the pressure regulator and unlock the lid.
- The jars will still be at the boiling stage or very hot, so remove the jars with a jar lifter.
- Allow the jars to cool completely in a draft free area.
- You may begin to hear the jars “pop”, this is the sound of the jars as they seal.
- Once the jars are completely cooled, check the seal by pressing down on the top of the lid.
- If the lid DOES NOT pop back up, the jar is sealed properly and can be stored on a shelf.
- If the lid is NOT pressurized, store the jar of meat in the fridge and use within 5-7 days.
- Label the jars for the type of meat and the date it was canned.
- a. Make sure the meat is fresh, or has been pre-frozen (freshness of ingredients has a lot to with keeping “the spoilers” from growing.
- b. Check all the jars for any cracks or chips, and do not use if they are damaged.
- c. Check rings and lids and do not use any which are worn (a perfect seal is vital to keep mold, yeasts, and bacteria out.
